Over the past several weeks I have been working on our fall food plot. Unless you have planted a food plot before, you may not realize just how involved, and how much pure work it is to plant a food plot for the wildlife.
Below, I will talk about all the steps I went through from start to finish, but first I will tell you a little about our food plot and some drawbacks we found from the start.
Our food plot is smaller plot at just over a 1/4 acre in size. It's a hard place to plant as one side of the plot is shaded by big tree's while the other gets many hours of direct sun. The other problem is the side that is shaded is also a lower area and tends to hold water. So, we have one side that is shaded and wet, and the other that is much dryer and gets more sun so choosing the correct thing to plant was tricky.
The other side to this story is that this is still considered a small plot. Therefore, I used the equipment available to me which is designed for smaller areas, not a large scale food plot. I would have needed to rent or purchase equipment like they use on large scale food plots as I am not farmer.
On to the steps of planting our fall food plot.
The first step was to choose the correct weed killer and spray the area where I intended to plant. For this chore, I did a little online research and then did some in store reading. I almost always use a name brand product, and as I am still doing a smaller area I don't need to get carried away with actual farming weed killers that makes hundreds of gallons. So for this, I chose RoundUp super concentrate. I went back and forth about which RoundUp product to use, as they have both the red and purple bottles which are basically the same thing, but one is a standard concentrate and makes about 10 gallons and the purple is super concentrate and makes about 23 gallons. I knew my area would require 10+ gallons so I went with the purple RoundUp Super Concentrate. The price is a little steep, but if you know you need it in the long run it was cheaper.


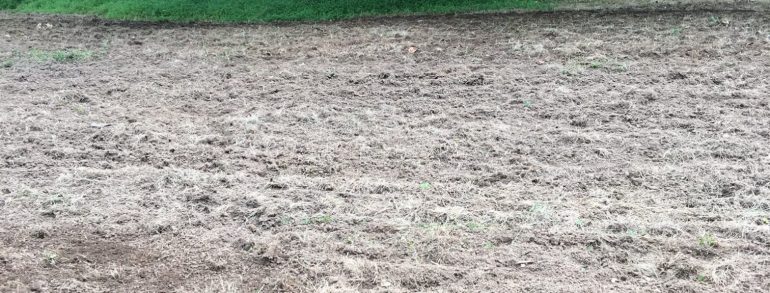
Pictures below is the "finished product" so to speak. This is about 7 days after spraying all the grass and weeds which I cut down to a manageable height before spraying.


After everything had died as shown above, I started the tilling process. The seed that I was planning to use was a combination of seed that actually needed planted at a correct depth and throw-and-grow type stuff. Regardless, I wanted to till the entire plot to ensure the nasty crabgrass, grass, and weeds that were currently where I wanted my fall food plot to be didn't have any chance of coming back. As mentioned above, the tiller I used (Pictured below) is a great machine, just maybe not the best option for what I was doing. As it's a little undersized and only really tills down about 4-5 inches.

After a long day of tilling with some help from a good friend of mine, I ended up with a nicely tilled plot that was almost ready for planting. There was one other downfall that I didn't realize about the tiller I used. It is the vertical shaft tiller versus a traditional horizontal shaft tiller and the end product it left me with was super good tilled dirt, but the grass and roots remained in large clumps as shown below. I started thinking about it, I could have tilled the whole plot again and spent hours and possibly ended up with a similar problem, or I could rake out all the clumps before planting. I decided to rake, in the end this was a miserable choice because that I did this on the hottest week of the summer in Central Maryland. Here are a couple pictures before I started raking and of what I was raking.

Before Raking

After Raking
After hours of raking and moving clumps of grass and drinking gallons of water, I got all finished up with getting the nasty junk out of the plot. Was this necessary? Probably not, but I felt with all the work and money that I had put into this plot, I wanted to give it the best chance at growing and leaving the clumps of grass and roots in the plot I felt gave them a chance to come back to life, which would mean they would take over the plot and kill the stuff I wanted growing. Finally, ready to plant.

What I was raking out
The next and final step before planting was to do a check on the soil PH before planting. Plants need the PH to be right for them to grow and thrive. If the PH isn't right for them, they could have problems or possibly not even grow at all. I used this Dr.meter Soil Moisture Meter Indoor Outdoor Sunlight PH Acidity 3-in-1 Soil Tester Kit for Garden Farm Lawn Planter(No Battery Needed) Easy Read Indicator handy solar powered PH tester which also will measure sunlight and moisture. All the seed I plan to plant calls for a PH higher than 6, anything less is to acidic for those types of plants. I tested the plot in a dozen or so places and it ranged anywhere from 6.5 all the way up to close 8 which is neutral. So, no lime was needed, if anything I should put some acid fertilizer on the plot, which I could have done before planting, but due to time and weather conditions I decided to plant now and fertilize when the plants are in their early stages of growing in hopes it kicks them into over drive growing just in time for hunting season.
This year when it came to planting, I decided to try a couple different types of seeds and decided to break the plot in half. The bottom half which gets more shade and stays wetter I used a mix of these two products. PlotSpike Quick Stand No-Till Seed, 12-Pound and Evolved Industries 70505 Throw & Gro Food Plot Mix, 5-Lbs.
Both of which are a throw and grow product that allowed me to spread the seed, and I then walked around just to try to push it into the dirt without actually covering it. On the top food plot, I used Antler King Red Zone
which is a mix of peas and beans which is a standard planting seed which required a little more work, so hopefully the deer enjoy it after all my hard work. This seed suggests that the seed should be planted 3/4 - 1 inch deep. I used a broadcast spreader as pictured below to spread it and then the real work came in. I started with trying to just walk the seed and that wasn't doing much, but it was getting dark. So, I ended up taking a rake the next morning and attempting to gently cover the seed with dirt trying to make sure it wasn't too deep or too shallow. I was finally finished planting and I took a picture to share with you so you could see the end product of a lot of hard work. Although it doesn't look like much other than dirt..... haha


Finished Product
We are hoping in the next few days to start seeing sprouting seed as this plot was planted last weekend 7/29 and 7/30. As the seed comes up, I have also put a trail camera out on the plot to capture the deer as they will likely start feeding on the tender peas and beans the minute they start coming up. I will also be writing food plot update posts with maintenance tips for your plot, as well as, updated pictures of how our plot is doing over the coming weeks.
